


Roderick Robertson
So, I present my first foray into the fascinating world of Paper Buildings: Orlanthi round huts. For my first attempt, I made simple walls, a thatched roof, and some decorations and doorways. At the bottom of this article is a link to download a zipped PDF with the buildings.
Construction
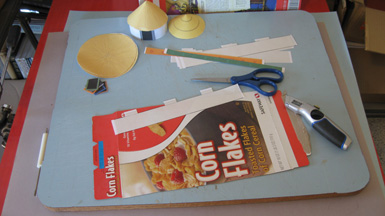
To work with paper, the tools are simple: printouts of the building, a work surface, scissors, glue (either white/PVC glue, or gluesticks), cardboard (if you want sturdier buildings), a straightedge and boxcutter/hobby knife (especially if you'll be cutting cardboard). I find that cereal box-cardboard is about the stiffest you want to get for making round huts - any thicker and it's tough to curve, and the overlap becomes unsightly.
 First, print your buildings. The attached file provides walls & doors for five huts, but only one roof, so you'll have to print the roof page once for each hut you plan to build. The files work in either Color or Black and White - the walls are a simple light cream color, and thatch naturally turns grey as it gets old, so you don't have to use up your color cartridges just to make some buildings.
Then, cut out your buildings. For buildings with long, straight cuts like the round hut walls, a paper cutter may prove useful. Don't worry too much if you cut inside or outside the lines of the walls - the upper edge will be hidden under the roof edge. And you can always print another page of walls if you mess up too badly. The tabs on the top of the wall will hold the roof on, so don't cut them off!
To help the roof tabs bend. use a straightedge and some sort of tool to scribe the line at the top of the wall - you don't want to cut the paper, just score it so it can fold easily. You won't need an extreme bend in the tab, as the roof is relatively steep.
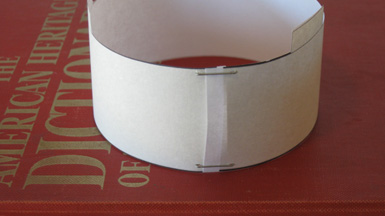 The quick and dirty way of making walls: simply staple the two ends of the wall to each other. The staples will be covered by the door
and the roof, so you don't have to be pretty. You can also use tape or glue, but glue a bit longer to dry, and the walls need to be held together while it sets.
The quick and dirty way of making walls: simply staple the two ends of the wall to each other. The staples will be covered by the door
and the roof, so you don't have to be pretty. You can also use tape or glue, but glue a bit longer to dry, and the walls need to be held together while it sets.
I assembled four sets of walls in about 2 minutes. One has the green "woman's magic" band glued on at the top of the wall. The doors are glued over the join in the paper, hiding the staples.
 To make a more sturdy house, use thin cardboard as a backing for the paper. I find it easier to cut out the wall (including the tabs),
then glue it to the cardboard, leaving the tabs sticking out above the cardboard. Put some wax paper over the wall, and rest a heavy item
(a dictionary works well, and you can see mine in the background).
To make a more sturdy house, use thin cardboard as a backing for the paper. I find it easier to cut out the wall (including the tabs),
then glue it to the cardboard, leaving the tabs sticking out above the cardboard. Put some wax paper over the wall, and rest a heavy item
(a dictionary works well, and you can see mine in the background).
One trick to using white glue - spread it around with your finger before pressing two pieces of paper together. You'll be able to slide the join a little to get edges to match up, and you won't get unsightly ripples in your paper.
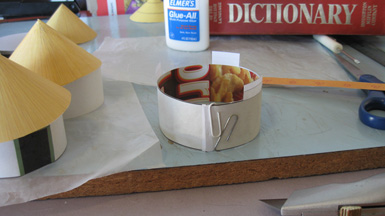 Bend the cardboard to shape. I overlapped and glued the cardboard, which made a rather unsightly edge, and made the building somewhat
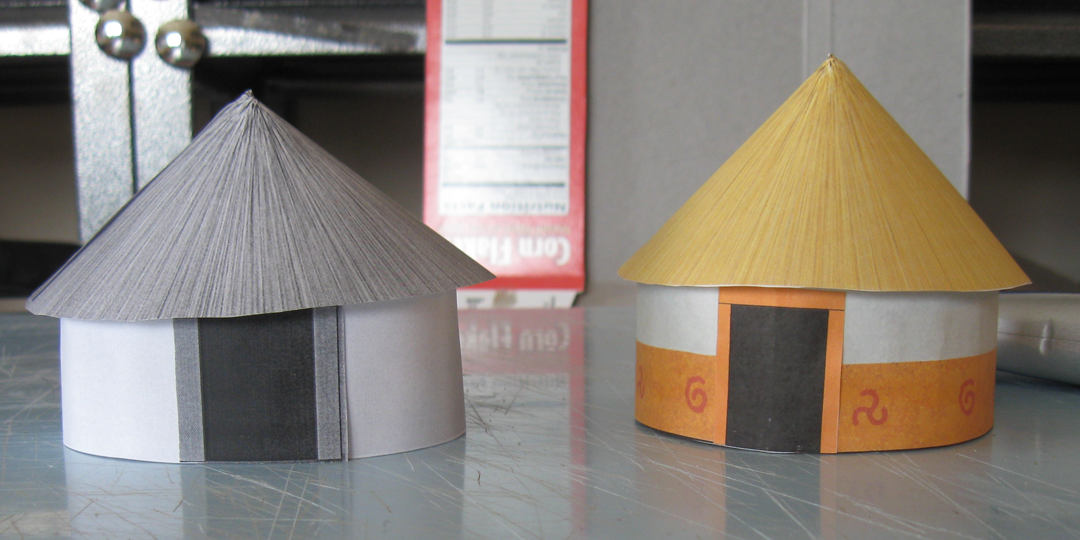
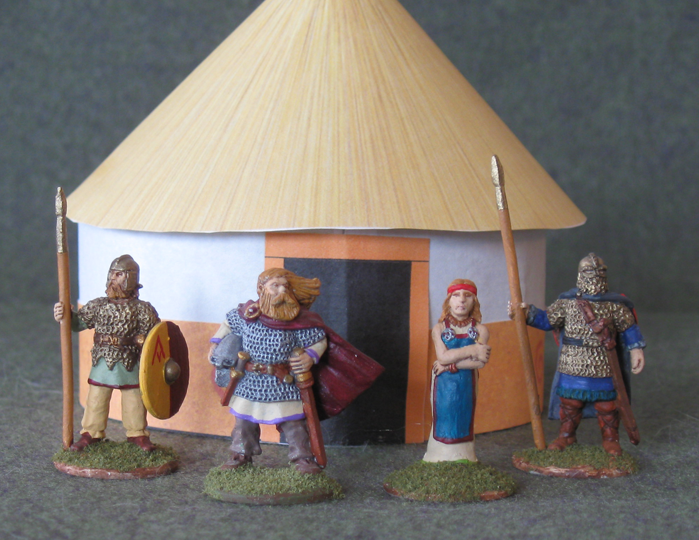
lopsided. Next time I will try butting the two ends together, using a paper patch to hold them together. I used simple paperclips to hold the cardboard while the glue dried; a clothespin would work as well. This sturdy dwelling would become the Chief's House; I added the orange "Orlanth" band to the bottom of the wall, then covered the join with the orange door.
Bend the cardboard to shape. I overlapped and glued the cardboard, which made a rather unsightly edge, and made the building somewhat
lopsided. Next time I will try butting the two ends together, using a paper patch to hold them together. I used simple paperclips to hold the cardboard while the glue dried; a clothespin would work as well. This sturdy dwelling would become the Chief's House; I added the orange "Orlanth" band to the bottom of the wall, then covered the join with the orange door.
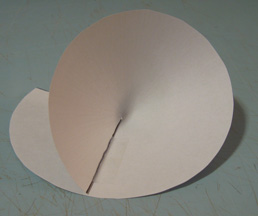 Now make your roofs. Cut the thatch out, then make a single cut to the center of the roof. It helps if you cut a small bit out of the
center of the circle as well - you'll find that it helps when making your cone. To make the cone, simply slide one end of the circle
under the other, and continue sliding until you have the roof pitch you want. I slide about a third of the circle under to attain these
roofs. Once I've got the roof to the correct pitch, I use a bit of tape to secure the interior flap, then use white glue on the outside
flap.
Now make your roofs. Cut the thatch out, then make a single cut to the center of the roof. It helps if you cut a small bit out of the
center of the circle as well - you'll find that it helps when making your cone. To make the cone, simply slide one end of the circle
under the other, and continue sliding until you have the roof pitch you want. I slide about a third of the circle under to attain these
roofs. Once I've got the roof to the correct pitch, I use a bit of tape to secure the interior flap, then use white glue on the outside
flap.
Bend the wall tabs slightly inwards, then cover them with glue. Slide the roof down over the tabs, and smooth the tabs onto the interior of the roof. You should be able to put the hut down and let the glue set. You may need to go back and re-glue the tabs if they don't stick the first time.
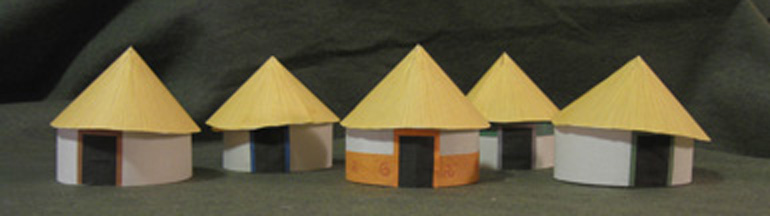
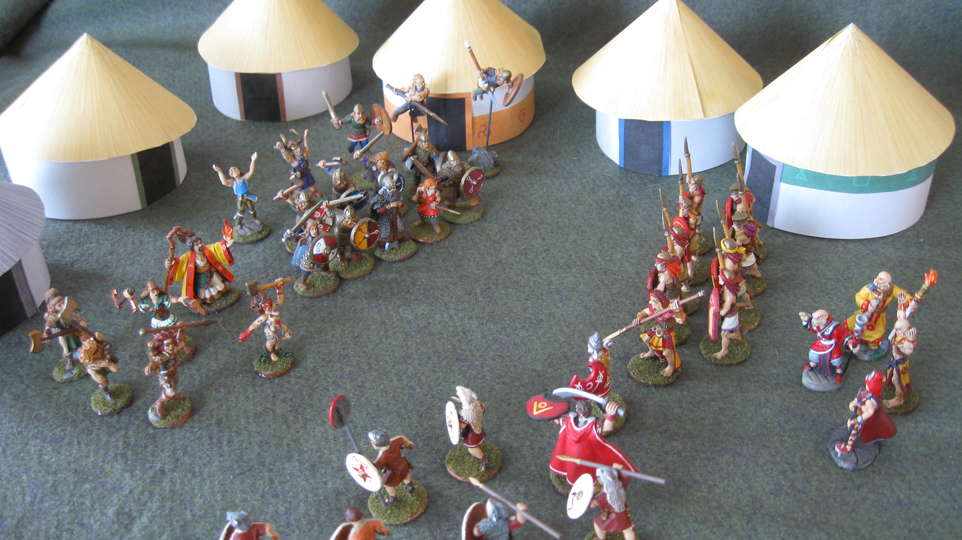
All done! Here are the five buildings in a group portrait. All told, I spent maybe an hour building my huts, from opening the file to having them ready to play. The longest time was waiting for the glue on the cardboard hut to dry.
The Village in Action
Download the building file (approx. 8mb)